
Download Vizible
Instructions
Welcome to Vizible
You’ve been invited to attend a Vizible session. Because you need to download the software and the 3D objects in the VR environment before you can join the meeting, we recommend going through the steps below before the session is scheduled to begin First time download and set-up for a Vizible meeting can take up to 15-30 minutes:
1. Download and Install Vizible Attendee
After the download, run the installer to install “Vizible Attendee” on your machine. For easy access, create a desktop shortcut for Vizible Attendee (you will be prompted to do this automatically).
2. Connect to Session
Once you’ve installed Vizible Attendee, click the Connect to Session button above or open the Vizible Attendee icon on your desktop and fill in the Session ID with the ID of the session you’ve been invited to.
If you were given a Session ID separately, you can also open up Vizible Attendee and enter the Session ID manually. It should be 3 sets of numbers separated by dashes, like 93-5412-5908.

3. Download Assets
If you’re going through these steps before the official start time of the Vizible session, you’ll see a red message indicating that the presenter of the session hasn’t yet joined (you can see it on the image above). If the presenter has already joined, a green message will appear saying “Session is Active!” If you see that message, go right to step 4.

While you can’t join the session until the presenter has joined, we recommend that you download the session assets in advance by clicking the “download assets” button on the Vizible Attendee login window, which also displays the size of the asset download. Downloading the assets will minimize your connection time when the meeting begins..
4. Configure Hardware
In the Attendee login window, select the device you will use to attend the session: Desktop, Oculus Touch, Vive, or WorldViz PPT system. (Note: we have preliminary, unofficial support for WinMR headsets. If using a WinMR headset, select “Vive” as your device.) See below for instructions for each device:
If using desktop:
- Make sure your microphone is enabled and set as your recording device, and that the volume is turned up for your sound output.
If using HTC Vive:
- In your sound settings, make sure the Vive is set as both your recording device and playback device and that the volume is turned up. It may show up simply as “USB device”
- Plug your headphones into the Vive. If using a Vive Pro, you can skip this step.
- Before you join the Vizible session, make sure SteamVR is running and that both your controllers have power and are turned on. If your controllers are not turned on before joining, you will have to quit and rejoin the meeting.
- Check the SteamVR window to see if everything is turned on and tracked properly. The headset and the controllers should show up as green icons:

If using Oculus Touch:
- In your sound settings, make sure the Oculus device is set as both your recording and playback device and that the volume is turned up.
- Open the Oculus Software and in the “Devices” section, verify that your headset, sensors, and controllers are all activated with a green light. You may need to push the buttons on the touch controllers to activate them.

- Keep Oculus software running in the background while you join your Vizible session.
If using WinMR headset:
Note: WinMR devices are not officially supported yet, but some users have been using WinMR headsets successfully by following these steps:
- Install the Windows Mixed Reality Steam application.
- Follow the same instructions as for the HTC Vive (see above)
- Your SteamVR window will look like this when your controllers are turned on and tracked
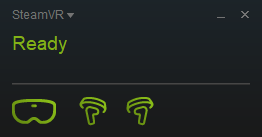
- Select “Vive” as your device in the Vizible log in window
Optional: once you’ve selected your device and configured it accordingly, test your hardware by clicking on the “Demo Scene” button on the Vizible log in window. You should hear audio and be able to see your controllers inside a simple Vizible scene.
In the demo scene, you can also try the Vizible Meeting Tool Set. Open the menu (see how here) and experiment with a few of the tools you have available (learn about the tools here).
5. Join The Vizible Session and Enter VR
When it’s time to join your session and the presenter has already joined, the “Sign In” button will be active on the Vizible Attendee log in window. Make sure your hardware is configured properly (as described above), and then click on the “Sign In” button. You’ll see a screen that says “Live Mic” as the session loads.
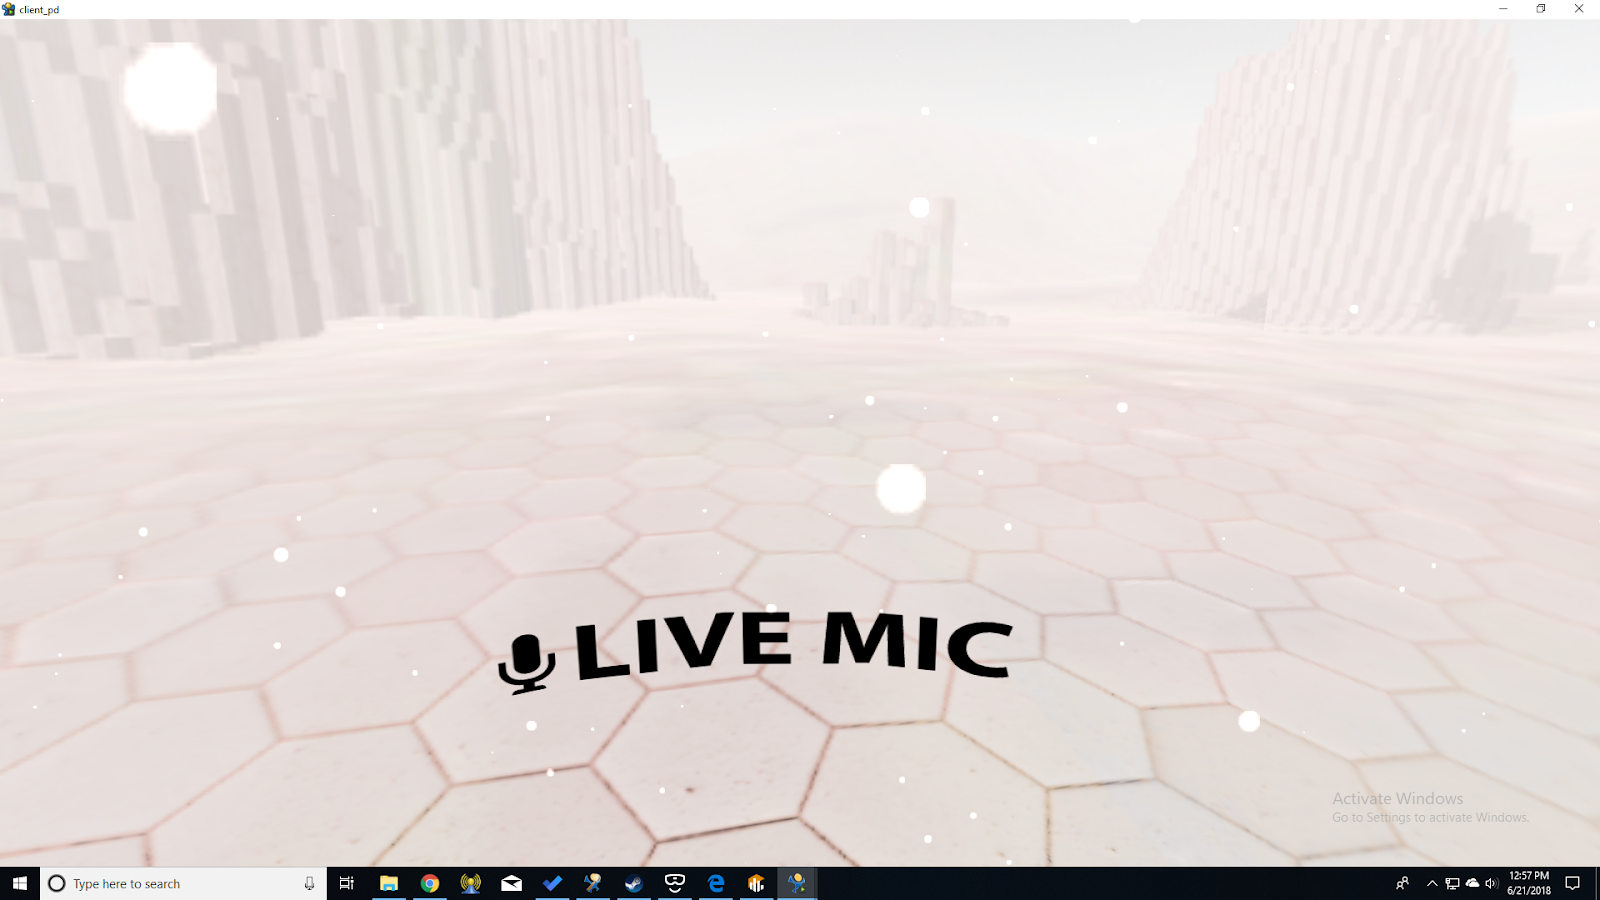
Wait for the session to load, put your headset on, and you’ll be inside the Vizible session with other participants. Your microphone will be active and controllers tracked, so give a wave and say hi!

Troubleshooting
If your hardware is configured properly but you run into an error while trying to connect, you may have something wrong with your network connection. Usually this means that the streaming services have been blocked by your network's firewall. You can see more details in our technical requirements.